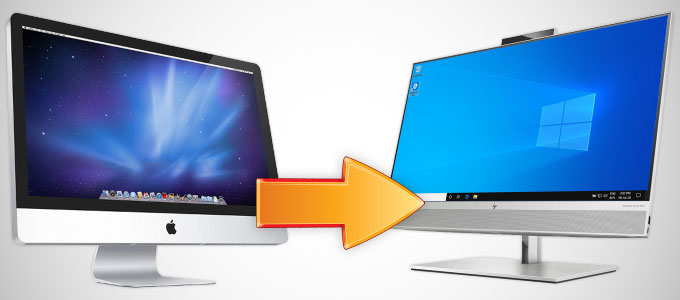
Setting up WordPress locally on your Mac
WordPress is one of the most popular Content Management Systems (CMS) on the Internet today, but doing Research and Development (R&D) work on the platform can be problematic at best. The reason is any R&D that you do on a Live WordPress platform has a potential risk of bringing your website down. So, what do you do if you want to create a new theme or test a new plugin to see if it meets your needs?
Well, you can install WordPress locally on your Apple Mac so that you can play around with the platform to your heart’s content. Luckily, there is a solution available where you don’t need to install and configure the Apache, PHP and MySQL packages on your Mac.
Process
1. To begin with, you need to download the WordPress CMS and an application called MAMP. MAMP or ‘Macintosh, Apache, MySQL and PHP’ is an all-in-one application solution where it turns your Apple Mac into a local ‘web server’. Like the name says, it provides the three most popular open-source software applications for your Mac. No installation or configuration of Apache, MySQL and PHP are needed.
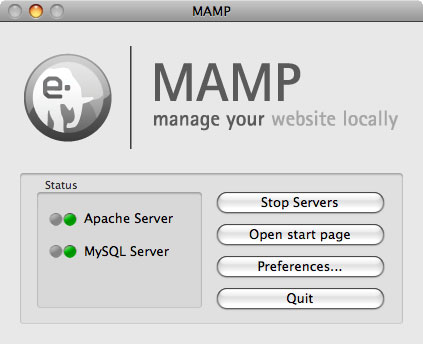
2. Once the MAMP application has been downloaded, open the .dmg file and drag the MAMP folder to your application folder. For convenience, you should also place the MAMP icon in your Dock (it’s inside the MAMP folder). Double-click the MAMP application to start the web services. When all the green lights in the Status window appear, your Mac is now a local web server. A web browser should also automatically launch displaying the ‘Start page’ for MAMP. This is where you control the MySQL and PHP functions, we come to those later.
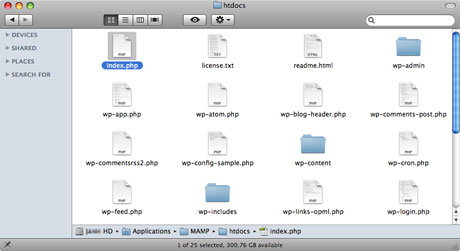
3. Locate a folder called ‘htdocs’ inside the MAMP folder. This is where you place files that you want to execute on your local web server. Unzip the WordPress ZIP file that you downloaded earlier and move or copy the files from within the WordPress folder to the ‘htdocs’ folder.
4. OK, your local web server is now up and running, the WordPress files are installed, all you need to do now is create a MySQL database for WordPress and you are done. This is the hardest part to accomplish, but follow these instructions and you will be fine. You need to go to the MAMP ‘Start Page’ web page; launch the MAMP application and click the ‘Open start page’ button (if you already don’t have it open from Step 2). Click the ‘phpMyAdmin’ navigation button which enters you to the MySQL administration screen. Find the ‘Create new database’ field and enter a name for the WordPress database. In this tutorial, I’ve called it ‘wordpressdb’.
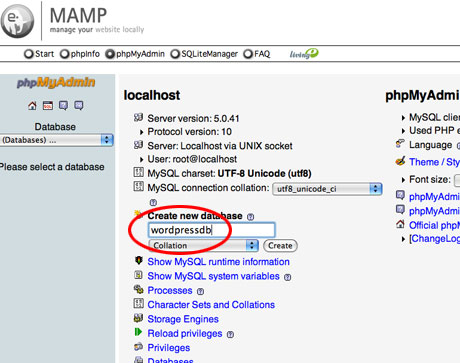
Click the ‘Create’ button. You should get a confirmation message saying that the database has been created. Don’t worry about creating tables for the database, the WordPress set up procedure will do that for you.
5. Go to your web browser and type ‘http://localhost:8888/‘ into the address bar.
6. You should get an error saying that the WordPress configuration file hasn’t been set up and you need to create one. Luckily, there is a sample given within the WordPress download. Go to the ‘htdocs’ folder within the MAMP folder and find the ‘wp-config-sample.php’ file. Right-click on the file and select ‘Open With’ and then select the Text Edit application. The PHP file should open in Text Edit. You can use any other text editor of your choosing if you wish.
7. Within the PHP file, you need to enter some details that enables WordPress to find and access the database that you’ve just created in Step 4. The database name, as given in this tutorial, is ‘wordpressdb’, and the user name and password by default for MAMP is ‘root’ (yes, they are same for both). So, within the PHP file:
- replace ‘putyourdbnamehere’ with ‘wordpressdb’,
- replace ‘usernamehere’ with ‘root’
- replace ‘yourpasswordhere’ with ‘root’
Once you have done that, select Save As… and save as ‘wp-content.php’ making sure that the file is being saved in the ‘htdocs’ folder. You should have some similar to the screenshot below:

8. Go back to your web browser and go to ‘http://localhost:8888/‘. As you can see, WordPress has been installed and is up and running. All you need to do now is go through the normal final set-up procedure and that’s it, WordPress is installed locally on your Mac.
Notes
- MAMP does not start up automatically when you login; you need to start the services each time. You can place the MAMP application in your Login items if you wish.


